Masterclass


 – Monday 12th December

Jack Shelbourn’s Masterclass: Working with a Director of Photography/Cinematographer

This week, Jack Shelbourn conducted a masterclass which focused on how he as a Director of Photography works professionally with Sound Operators, to give us tips and advice on how to appropriately work within this relationship.

Jack opened the session by outlining his own experiences while working with a Sound Operator, Jack Fairey, who have worked together successfully numerous times. Jack highlighted the importance of the relationship between these two positions and suggested they get hired as a team on many jobs because their confidence, trust and abilities to work so well together.

Initially, Jack showed us photos from behind the scenes of a film they had recently worked on. One thing that was highlighted and made very clear to us, was that Paul was always situated immediately behind Jack, where possible. This allowed Paul to capture the sound from behind the camera – the audience’s perspective – a very important factor to consider when working both on-location and in post production. Because of this close proximity, it is important to know who you are working with confidently, and have the ability to communicate about framing, position, lights, etc.

This led on to a short conversation about lenses. Jack portrayed the importance of knowing the lingo on set, which always work to flower quicker, as setup can be completed more efficiently. For example, understanding that the smaller the lens number (say 18mm) means the wider the shot. From this information, the Sound Operator can decide the optimal position to boom from and know how close they can get to the actor, instead of waiting for the shot to be set up and having a look on the monitors, then setup afterwards.

After this, Jack explained some techniques Paul uses on set in order to improve his work. The first of these is creating an individual dialogue booth at the location. Paul always carries duvets, which he erects into a makeshift dialogue booth and gets the actors to run through every line in the film. This allows him to have backups of the dialogue incase the dialogue captured during the shoot is unusable for whatever reason. Also, because this is on set and not in a studio, it has similar background noise without be studio-quality clean, which saves time later in the mix. Additionally, Paul make sure he does this at a time which is convenient and efficient for all involved – whether this time is before the shoot while the camera and lighting equipment is being setup, or afterwards when equipment is being packed down. Another technique he used was planting radio mics inside a car as plant mics. This meant Paul did not need to boom but just monitor once the mics had been taped securely, and hidden from shot.

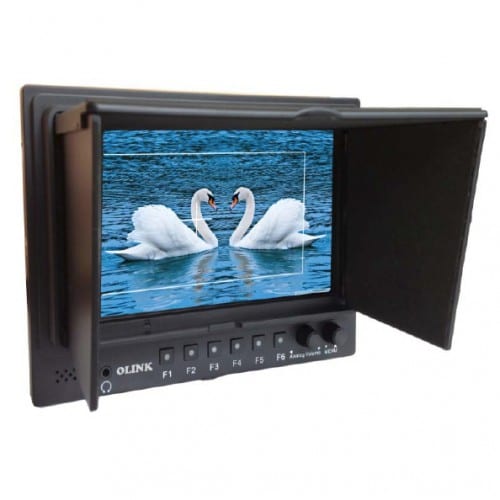
Subsequently, Jack setup a Panasonic 4K and allowed us a closer look, as he thought we probably haven’t had a chance on set and we aren’t allowed to book them out. One thing of interest for us is that on the monitor, you can set two white horizontal lines at the top and bottom of the screen, any space above the top line or below the bottom line will not be shot, even though it is on the monitor. This allows the DoP time to react to a lowering boom, or any boom shadows. Or if there is a larger monitor on set, allows the Sound Operator to see whether the boom will be in shot.

Only image inside of the white lines will be shot. Photo taken from https://borge.com.au/7-hd-sdi-hdmi-led-lcd-field-monitor/
Only image inside of the white lines will be shot. Photo taken from https://borge.com.au/7-hd-sdi-hdmi-led-lcd-field-monitor/ 

Penultimately, Jack constructed us a 3-point lighting rig, which includes a key light, backlight and fill light, which is commonly used for documentary interviews. He suggested ways in which to get around boom shadows, such as using flags or scooping the boom.

Finally, Jack showed us a new type of single-handed steady cam that can be linked to a mobile phone via an app. It was very small and lightweight and held in one hand, and double tapping a trigger will make the lens stabilize. It looked like a very cool gadget, and surely an important piece of technology to get used to in the future. Jack rhetorically asked us how we would deal with equipment like this in the future with regards to booming and shadows etc.

Overall, this was an excellent session from Jack, who was very informative and helpful, answering all the questions we asked. The techniques he taught us will be great to try out and use in the future when on location. This session really highlighted the importance of professionalism, efficiency and communication when on set, and suggested how it would be helpful going forward to learn other media terms and equipment, such as lenses.


Hydrophone Testing


– Thursday 8th December 

Experimenting with Hydrophones

Rob and I had a spare couple of hours between Sound Theatre bookings, so decided to rent out the new hydrophones Media Loans had recently purchased. Neither of us have had any experience using hydrophones before, so we just jumped straight in.

First of all, we took the hydrophone to the canteen in the MHT and experimented with filling a plastic cup with water and placing it inside, as well as doing the same with the sink. We turned the tap on, allowed the sink to drain and waded the hydrophone around in circles.

Hydrophone in the sink while the tap was on.

After this, we went to the Brayford just opposite the Minerva building to see how it sounded in more free flowing water. The resulting sound was perhaps not as exciting as we had hoped for, as the clip sounds very noisey. We were also interrputed by some ducks and an angry swan, who swam over and started hissing at us! We took this as our cue to leave…

Me submerging the hydrophone in the Brayford, just before the ducks came to attack!
Submerging the hydrophone in the Brayford, just before the ducks came to attack!

Finally, we thought it would sound interesting to have a tablet or such like dissolve into water while the hydrophone was suspended within. Therefore, we took a short trip to Spar, bought some dissolving denture tablets and went back to the MHT canteen to experiment. Unfortunately, the tablets were not as violent and ferocious as we hoped they would be when reacting with the water. We tried both inside a plastic cup and in the sink but the reaction was not so exciting.

Rob holding the hydrophone in a plastic cup filled with water and a dissolvable tablet.

It was a fun way to spend some time, but I don’t think we’ll be using any of the recordings for Cognition. It would be good to do some more research into hydrophones, and contact mics as well, to learn proper techniques, allowing us to use them creatively in the future. My favourite sound of the day was probably when we squeezed a dense sponge above the sink, while the hydrophone was submerged within:

With some processing it could sound like an old-school calculating robot or high-tech device used in a sci-fi film perhaps!

Ambience, Foley and SFX Practice

Tuesday 11th October – Sunday 20th November

Callback

Opening Titles.
Opening Titles

David sent an email around asking if anyone wanted to help with post for a short film with a graduate of this course, Matt North. Myself, Dan and Rob all took on the challenge. Matt explained that all he needed from us was to source Ambience, Foley and SFX, the Dialogue he was happy to do himself, and the Music was already done. We understood that we were helping as Matt was too busy to complete the entire project himself.

Through discussions with Matt, we eventually decided to split the film up into four reels, and set the target of one reel per week – the reels were roughly equal, around 5 minutes each.

We got on very well, the locations in the film included a café, Eaton Park in Norwich, a quiet suburban street, the coastal town of Cromer in Norfolk including the beach and the arcade, another park, the interior of a house and another café. The cafés were great to source, as we also included the traffic noises of the busy street outside, with sounds of cars whirring past. We layered all scenes, such as the café ambiences, the birds, trees, wind, cyclist in the park, the wind, sea, waves, seagulls at the beach, etc.

There was a lot of Foley to do, the footsteps of the characters on several different surfaces, such as concrete, sand, stones. Other Foley included cloth movements, the rolling of dice, high-fives, mug handling, etc.

We sent the film off to Matt and he finished the Final Mix a week later. He let us know that as the film was entering festivals, we could not see the final product yet.

This was a very enjoyable project and a new way of working for us. As Matt was completing the final mix himself, all he needed was a premix of our Effects session. This meant that we made small level adjustments and edits throughout, but the bulk of this would be done by Matt. It was an odd concept to send him half-finished work as I have been used to completing a project start to finish, this gave me a great insight into how real-world pre-mixing works. I am very excited to see the final product and gained additional experience working on Foley, layering Ambiences and sourcing SFX.

Location Sound


Wednesday 2nd November 

Location Sound work at The Kinema in the Woods 

Last week, MA student Ed Kirk contacted me with some location sound and post-production experience. This included a short documentary he is working on which is taking place at The Kinema in the Woods. His documentary is being used both for his hand in and also as a promotional tool for the Kinema. Ed checked out the Kinema’s online presence and believed there was a good opportunity to improve this, whilst also creating something for his course.

IMG_1636

We turned up at 8am, when Ed had arranged to meet the General Manager, a Front of House worker, and hopefully the Organist, who he had called and said he would make it if he could. The equipment I took was a Sound Devices 633 Field Recorder, Sennheiser MKH416 Rifle Mic, Sennheiser Radio Mic available from media loans and Zoom H4N recorder. While Ed and Kieran Hill (CLM student) were setting the equipment up, I ventured into the woods next to the venue to record some wild track.

Unfortunately, the Kinema is situated beneath a main air traffic route, as aeroplanes were flying in both directions constantly, creating a continual noise on the wild track. This meant that no wild track could be used for the opening shots. However, this wasn’t a worry of mine as I knew I could provide atmospheres and SFX from the SFX library at the University.

Next, we moved inside to conduct the interviews. After switching off the several heaters which were warming the venue and the speakers which were creating a hiss, the ambience of Kinema 1, the first screen, was nice and warm. I boomed and used the radio mics simultaneously for all three interviews, thinking that I would be using the radio mics for back-up. Due to the camera and lights set-up, I was able to get in close when booming.

Fortunately, during mid-morning the organist arrived and was happy to demonstrate the Compton Kinestra organ which has been installed at the Kinema. This means that during screenings, the Kinema pause the film for an intermission for the audience to grab snacks or go to the toilet, meanwhile Alan pops up from beneath the stage on his organ to entertain the crowd. While Alan was demonstrating his craft, I used the Zoom to record the music. However, when looking back at the files I found that the combination of the organ, speakers, and my own position, meant there was hiss on the track as well as the sound of Alan playing the actual keys on the organ. After this, while Ed and Kieran were capturing B-roll, I was left alone in the Kinema to record some wild track.

Overall, I was happy with how the day went. The outside wild track was unusable but that didn’t matter so much as I could use sounds from the SFX library. I believed that the interviews were recorded well on both the boom and radio mics. However, when checking the files after I arrived home, the levels were quite low, even though the gain was set about halfway on the Sound Devices, and I was booming from very close up. Again, I didn’t think this would be too much of a problem, as the signal to noise ratio was low, so increasing the level of the dialogue shouldn’t affecting the increase of the background noise too much. This also gave me an opportunity to sharpen my skills with RX, which is on the next blog post concerning the post-production of the documentary.

If you want to see a short clip of the organist at the Kinema, follow this link!


Record Producer


Thursday 13th October

George Shilling 

This week, George Shilling, record producer, recording engineer, mastering engineer and musician, visited the university to give a talk to the (BA Hons) Music students. Luckily enough, a handful of AP students were allowed to sit in on the session with George. To visit George’s website, follow this link.

George separated his lecture into two parts: the first was regarding himself, how and why he got into the music industry, where he was (or not!) schooled in HE, how he landed his first recording engineer job with Livingston Recording Studios, and where he went from there. Throughout the lecture, he would refer to ‘Lightbulb Moments’ during his career. These were positive moments in his career which allowed him to develop and progress. One such moment was when George was called to produce a track for Coldcut, who used a certain type of PC to program their sounds. Even though he had not produced a track before, George accepted the job and went out the next day to buy this same PC ad spent all of his free time studying how to use it before this session.

George also talked about diversity during his career, and highlighted the importance of this. For example, he was an excellent Cellist while growing up, but left it behind when he got into the recording industry. However, when he built his own studio later on in his career and could afford instruments within it, he bought a Cello so he could play again, and now offers to add accompaniment to tracks he records and produces – expanding his skill set. Another example of that is doing the lecture itself in order to generate money, or playing live shows for artists.

The second half of George’s talk was strictly ProTools based. He opened up a few sessions and showed us several tips and tricks he had used in order to achieve a certain effect in his recordings. Of these effects included both compressing the signal multiple (4 to 5) times to mimic analog tape recorders, and others included a way of creating a reverb processed twice, both of very long durations, in order to add an underlayer to the vocal performances. Finally, he explained that he enjoying muddying his music when recording on ProTools as it seems too clean for him in this day and age, so use many processors in order to achieve this with his music, to create excitement and life.

This talk was very interesting, but I felt it was perhaps more suited to a student recording an EP this Semester, unlike myself doing Location and Post Sound. Also, I felt that he talked about the past a lot which wasn’t greatly helpful for students of today, who want to know what’s going on in the industry right not, and how we can get into that industry successfully.